
Installation instructions for 132 kV cable termination kit
2026-08-21
- Preparing for installation: tools, conditions and kit check
- Step-by-step instructions for cutting and preparing the cable
- Installation of heat-shrinkable elements and contact tips
- Typical installation errors and methods for preventing them
- Quality control and acceptance testing
- Choosing a reliable supplier: why the quality of components matters
- Frequently Asked Questions
Preparing for installation: tools, conditions and kit check
Installation of a cable termination for a voltage of 11 kV is not just a mechanical connection of wires, but the creation of a complex dielectric system that must withstand high-intensity electric fields, temperature expansion and external climatic influences. An error at the preparation or installation stage can lead to insulation breakdown after several months of operation, which will entail costly equipment downtime and emergency work. In our practice, we have repeatedly encountered situations where 20 minutes saved on surface cleaning or careless cleaning of the screen led to failure of the entire cable line.
Before you begin, you need to make sure that you have all the necessary tools and materials at hand. The absence of even one specialized tool, for example, a calibrated insulation stripper or a torque wrench, forces installers to use improvised means, which is strictly unacceptable when working with high-voltage equipment. For high-quality installation of the termination kit you will need:
- Stripping tool:Special knives or strippers that allow you to remove layers of insulation and a semiconducting screen without damaging the conductive core and the main insulating layer. The use of a conventional mounting knife often leads to micro-cuts on the core, which become centers of corona discharge.
- Measuring tool:Vernier calipers for precise measurement of cable diameter and embedment depth, as well as a torque wrench for tightening bolted connections to the required torque. Overtightening the bolts can deform the contact surfaces, and undertightening can cause overheating.
- Cleaning and degreasing agents:Lint-free wipes and a special solvent (isopropyl alcohol or an equivalent recommended by the manufacturer). Surface cleanliness is the key to adhesion of heat-shrinkable tubes and tightness of connections.
- Heat Source:Propane torch with adjustable flame or industrial hair dryer. For heat-shrinkable sleeves, uniform heating is critical. The open flame should be soft, yellow, without a blue cone, so as not to damage the tube material.
- Protective equipment:Heat-resistant gloves, safety glasses and protective clothing. Working with open fire and chemicals requires compliance with safety regulations.
Environmental conditions play a decisive role. Installation is not recommended at temperatures below -5°C without special heating of the cable and working area, since polymer materials lose elasticity and may crack when shrinking. It is also prohibited to work during rain, snow or air humidity above 80%, unless a special protective tent is used. Moisture trapped under the insulation turns into steam when heated, forming voids that eventually lead to electrical breakdown.
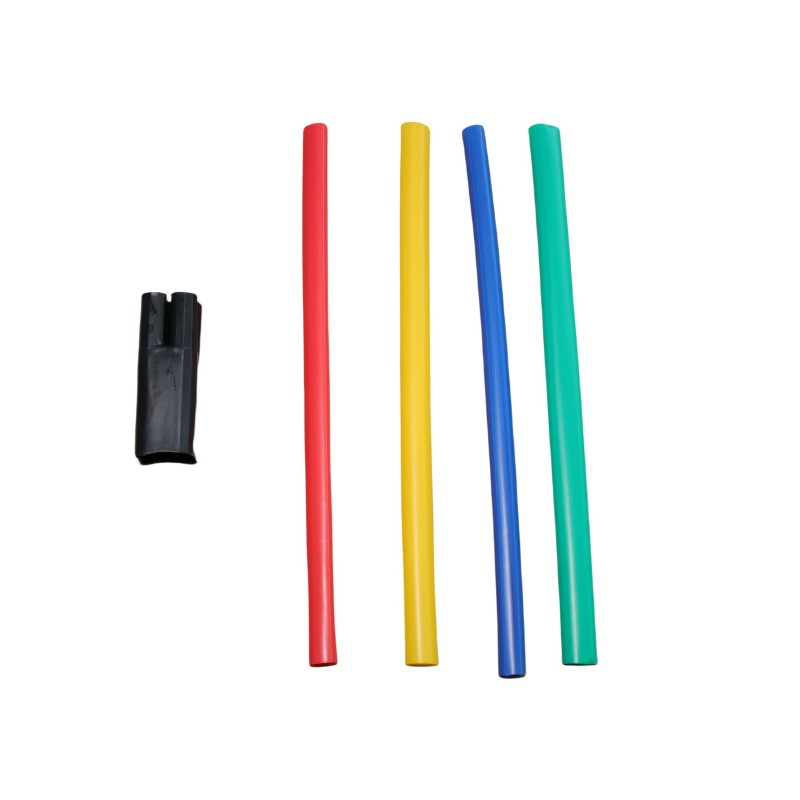
Before starting work, carefully inspect the packagingtermination kit 11 kV. Make sure that all components are present according to the packing list: heat shrink tubing (inner, outer, skirt), contact tips, sealants, tension springs (if provided by design) and manufacturer's instructions. Check the expiration dates of materials, especially adhesives and sealants, as their properties degrade over time. If you are using products from trusted suppliers such asShijiazhuang Hist Electric Co.,Ltd, you can be sure of compliance with shelf life and packaging integrity, since the company has its own specialized warehouses with climate control.
Step-by-step instructions for cutting and preparing the cable
Proper cable termination is the foundation of a reliable termination. Every millimeter of insulation removed matters. Incorrect geometry of the transitions between cable layers creates an uneven distribution of the electric field, which leads to local overvoltages. Below is a detailed sequence of actions based on many years of experience in installing power cables with cross-linked polyethylene (XPE) and PVC insulation.
- Fixing and marking the cable.
Secure the cable in a vice or on a special machine so that it does not twist or move. Measure the required cutting length according to the instructions for the specific coupling kit. Typically this length is between 600 and 900 mm, but may vary depending on the type of tip and method of attachment. Make clear marks with a marker on the outer sheath of the cable. It is important to take several control measurements with a caliper to ensure that the future cutting is symmetrical. We recommend making markings with a margin of 1-2 mm in the direction of increasing the cutting length, since the excess can always be cut off, but it is impossible to increase the missing.
- Removing the outer shell and armor tape.
Carefully cut the outer polymer shell along a circular mark, avoiding deep cuts to the metal shield or armor. Remove the casing. If the cable is armored with steel bands, secure the end of the armor with banding wire to prevent it from unraveling. Remove the armor tape using wire cutters or tin snips. Clean the area under the bandage from any remaining bitumen or dirt. The surface must be clean and dry. At this stage, they often make a mistake by leaving sharp edges of the armor tape, which can damage the internal layers of insulation during further manipulations. All sharp edges must be carefully smoothed with a file.
- Treatment of metal shield and grounding.
Pull the copper wires of the screen back along the cable. If the screen is made of aluminum foil, it must be carefully removed or secured depending on the design of the coupling. To ensure reliable grounding of the screen, a special spring or braid included in the kit is used. Install the spring where the screen is cut, ensuring good electrical contact. This is a critical element for draining leakage currents and equalizing potential. In our testing laboratory, where products are tested up to 1000 kV, we see that poor shield ground contact is one of the main causes of premature aging of insulation in the termination area.
- Removing the semiconducting screen and core insulation.
This is the most critical stage. It is necessary to remove the outer semiconducting layer, leaving a strictly defined distance to the end of the main insulation (usually 20-30 mm). Use a special tool to avoid damaging the main XLPE insulation. Even a microscopic scratch on XLPE insulation will become a point of concentration of the electric field. After removing the semiconducting layer, thoroughly sand the insulation surface with sanding paper or the special sponge included in the kit to remove any remaining semiconducting material. Then remove the inner core insulation to a length equal to the depth of the contact tip plus 5 mm. The core must be perfectly clean, free of oxides and contaminants.
- Forming a cone and applying sealant.
At the end of the main insulation it is necessary to form a smooth cone (fading) for a smooth transition of the electric field. Some modern kits use special silicone rubber stress cones, others require the cone to be formed by grinding off insulation or using mastics. Follow the manufacturer's directions. If sealing compounds are used, apply them evenly to the transition areas, avoiding air bubbles. Air inclusions are weak points of the dielectric. Make sure that the surface is completely covered with sealant, but without any excess that could interfere with the shrinkage of the tubing.
After completing the cable preparation, check again that all surfaces are clean. Any speck of dust or fiber from a glove can cause a defect. Wipe the insulation with a lint-free cloth soaked in solvent, moving only in one direction - from the core to the screen, so as not to transfer contaminants back to the cleaned area.
Installation of heat-shrinkable elements and contact tips
Heat-shrinkable technologies dominate the cable accessories market for voltages up to 35 kV due to their reliability, ease of installation and ability to adapt to irregular geometries. However, the shrinkage process itself requires strict adherence to temperature conditions and consistency. Incorrect heating can cause wrinkles, bubbles, or even burns through the material.
Start by installing the inner insulating tube. Place it on the cable, making sure that it covers the transition area from the main insulation to the semiconducting screen with the necessary margin. Inside the tube there is often an adhesive layer that melts when heated and provides a seal. Start heating from the middle of the tube, gradually moving the burner flame to the edges. This forces air from underneath the tube to the ends, preventing air pockets from forming. Hold the burner 15-20 cm from the surface, constantly rotating the cable or moving the burner in a circle for even heating. The material should fit tightly, following the contours of the cable. The appearance of glue along the edges of the tube indicates sufficient heating.
Next, install the contact tip. Select a lug that matches the cross-section of the cable core. For 11 kV cables, bolted or crimp terminals are usually used. If using a bolt lug, push it onto the conductor until it stops. Tighten the bolts with a torque wrench in the order specified by the manufacturer (usually in a criss-cross pattern) to the recommended torque. Excessive force can strip the thread or deform the tip, while insufficient force can lead to an increase in contact resistance and overheating. We strongly recommend using lugs with torque control or indicator washers if included.
After fixing the tip, install the outer protective tube and skirt. The skirt serves the function of increasing the surface creepage distance and providing weather protection. When installing the skirt, pay special attention to its connection to the outer tube. An additional layer of sealant or special tape is often used here. Warm up the skirt carefully, avoiding local overheating of the thin edges. The flame should be soft. If you see the material begin to change color or bubble, immediately stop heating the area and allow it to cool, then continue at a lower intensity.
It is important to note that the companyShijiazhuang Hist Electric Co.,Ltdproduces both heat-shrinkable and cold-shrinkable couplings. Cold-shrinkable technologies based on the use of shape memory elastomers eliminate the risk of thermal damage to the insulation during installation, since they do not require the use of open flame. They are especially recommended for work in enclosed spaces, near flammable materials or at low temperatures where flame control is difficult. The choice between thermo- and cold-shrinkable technologies should be based on specific site conditions and the qualifications of the installation team.
Typical installation errors and methods for preventing them
Even experienced installers sometimes make mistakes that reduce the service life of the cable line. Analysis of failures in power systems shows that most accidents occur not due to defective equipment, but due to violations of installation technology. Let's look at the most common problems and ways to avoid them.
| Installation error | Consequences | Prevention method |
|---|---|---|
| Damage to the main insulation when removing the semiconducting screen | Local increase in the electric field, partial discharges, breakdown after 6-12 months. | Use only specialized stripping tools. Control the cutting depth. Visual inspection under bright light. |
| Presence of air bubbles under the heat-shrinkable tube | Development of partial discharges in air inclusions, insulation erosion, thermal breakdown. | Heat the tube from the center to the edges, displacing the air. Use a burner with a soft flame. Thoroughly degrease the surface. |
| Insufficient surface cleaning of semiconducting material | Current leakage along the insulation surface, overheating, destruction of the sealant. | Use abrasives recommended by the manufacturer. Wipe the surface until the black marks on the napkin completely disappear. |
| Violation of tightness in the area where the core enters the tip | Moisture penetration, contact oxidation, increase in contact resistance, fire hazard. | Careful application of sealant. Use of hot melt adhesive rings. Control of glue release during shrinkage. |
| Installation at subzero temperatures without heating | Brittleness of polymers, shrinkage cracks, poor adhesion of adhesive layers. | Heating of cables and components to temperatures above +5°C before installation. Use of heat guns in the work area. |
Particular attention should be paid to the quality of the screen grounding. In our practice, there was a case when a team of installers saved time and poorly cleaned the contact point of the grounding spring with the metal shield of the cable. After two years of operation, local heating occurred at this point, which led to screen burnout and subsequent phase breakdown to ground. The repair took three days and required replacing an entire section of the cable line, 50 meters long. This incident highlights the importance of every element, even the smallest one, in a high-voltage insulation system.
Another common mistake is ignoring recommendations on the minimum cable bending radii after installation. The termination makes the cable more rigid in this area. Attempting to bend the cable too much may cause the inner layers of the coupling to peel off or damage the core insulation. Always observe the minimum bending radius specified in the cable data sheet and the instructions for the coupling.
Quality control and acceptance testing
Installation is only considered complete after a visual inspection and, if necessary, electrical tests have been carried out. Visual inspection should be carried out immediately after the coupling has cooled down. Check for cracks, folds, bubbles and burns on the surface of the heat-shrinkable tubing. Make sure that all elements are installed symmetrically and that the sealant comes out evenly along the edges of the tubes. Check the reliability of the bolted connections of the tips.
For highly critical facilities or when there are doubts about the quality of installation, partial discharge (PD) measurements are recommended. Modern termination kits, such as those manufactured byShijiazhuang Hist Electric Co.,Ltd, are designed to meet low partial discharge requirements. However, installation defects may negate these benefits. PD measurements can reveal hidden defects, such as air inclusions or sharp edges, that are not visible during visual inspection, but are sources of a future accident.
The DC resistance of contact connections is also measured. It must comply with PUE (Electrical Installation Rules) or local standards. High resistance indicates poor contact in the tip, which will lead to overheating under load. The AC withstand voltage test is a traditional method of testing insulation, but it can be aggressive on new XLPE insulation. Therefore, preference is increasingly being given to direct current (DC) or very low frequency (VLF) tests, which are less destructive and more informative for identifying defects.
Documentation of installation and testing results is mandatory. Draw up a protocol in which you indicate the lot number of the coupling kit, the date of installation, the names of the installers, the results of visual inspection and electrical measurements. This will help in the future when analyzing the condition of the cable line and will ensure traceability of the work.
Choosing a reliable supplier: why the quality of components matters
The cable accessories market is saturated with offers from hundreds of manufacturers. However, the difference in the quality of raw materials, production control and engineering of products is colossal. Cheap analogues often use recycled materials for the production of heat-shrinkable tubes, which reduces their dielectric properties and service life. In addition, the lack of strict dimensional control can lead to the fact that the coupling simply will not fit the cable of the stated cross-section or will shrink unevenly.
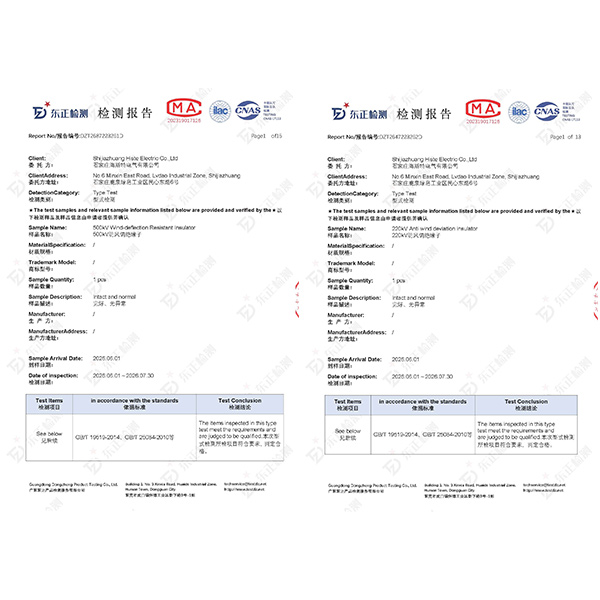
When choosing a supplier, pay attention to the presence of its own testing facility. CompanyShijiazhuang Hist Electric Co.,Ltd, founded in 2004, invests heavily in scientific and technical base. Having one of the largest electrical engineering laboratories in Northern China, capable of testing up to 1000 kV, allows the company to verify each new solution and ensure product compliance with international standards such as IEC, GOST and IEEE. This is not just a marketing statement, but real engineering competence, confirmed by more than a dozen patents and long-term cooperation with design organizations around the world.
Technical support is also an important aspect. A professional manufacturer does not just sell a “box of parts,” but provides complete instructions, drawings and installation advice. The company's engineers are ready to help with selecting the right kit for a specific cable type and operating conditions, be it the hot climate of the Middle East or the cold winters of Russia and the CIS. This integrated approach reduces the risk of errors at the design and procurement stage.
Products supplied to the markets of the CIS, Southeast Asia and Africa undergo strict incoming control of raw materials and acceptance tests. This ensures consistency of performance from batch to batch. For contract construction companies and energy supply companies, this means predictable installation times and no surprises on site. The philosophy of responsibility for the final result distinguishes a mature manufacturer from a simple merchant.
Frequently Asked Questions
Can I use the same termination kit for cables from different manufacturers?
Yes, most modern kits are universal and suitable for cables with cross-linked polyethylene (XLPE) and PVC insulation from various manufacturers, provided the core cross-section and voltage class match. However, it is critical to check the outer diameter of the cable sheath and the diameter of the core with the range specified in the instructions for the coupling. The spread of diameters at different plants can reach 1-2 mm, which is essential for tightness. Always measure the actual cable diameter before ordering.
What to do if the tube bursts during shrinkage?
If the heat shrink tube bursts, it can no longer be used. A damaged element will not provide the required dielectric strength and tightness. It is necessary to carefully remove the remains of the burst tube without damaging the underlying layers, and replace it with a new one from a repair kit or a new set. The cause of the blade is most often local overheating (the flame is too close) or the presence of a sharp edge under the tube. Correct the cause before reinstalling.
What is the service life of a properly installed 11 kV termination?
If the installation technology is followed and there are no external mechanical damages, the service life of high-quality heat-shrinkable or cold-shrinkable end seals is at least 25-30 years. Products tested for aging and cyclic loads, just like in the laboratoryShijiazhuang Hist Electric Co.,Ltd, demonstrates high stability of parameters throughout this period. However, regular monitoring of the condition (thermography, PD measurement) is recommended every 3-5 years.
What is the advantage of cold-shrinkable couplings over heat-shrinkable ones?
The main advantage of cold-shrinkable couplings is the absence of thermal effects on the cable insulation, which eliminates the risk of thermal aging or damage to the XLPE during installation. They are easier to install as they do not require skills in operating a burner or temperature control. This makes them ideal for installation in cramped spaces, areas with high fire hazards or low temperatures. However, they are usually more expensive than heat-shrinkable counterparts and require care when removing protective films during installation.
Do I need special training to install 11 kV cables?
Yes, installation of high-voltage cable lines should be carried out only by specially trained personnel who have an electrical safety group of at least III-IV (depending on local standards) and a certificate of completion of training in the installation of cable joints. The manufacturer usually provides certificates or conducts training for installation organizations. Self-installation by unqualified persons is unacceptable and dangerous and will void the equipment warranty.
Selecting the correct termination kit and strictly following the installation instructions is an investment in the reliability of your power system. Do not skimp on the quality of components and the qualifications of installers. For technical advice on selecting couplings for your specific cables and operating conditions,contact us today. Our engineers will help you find the optimal solution that combines reliability, durability and cost-effectiveness.