
Complete DIY Heat Shrink End Sleeve Installation Guide
2026-06-07
- Introduction: Why Proper Installation of Heat Shrink Termination Determines Cable Life
- Preparatory stage: Tools, materials and safety requirements
- Step-by-step instructions for installing a heat-shrinkable end sleeve
- Typical installation errors and methods for preventing them
- Quality control and acceptance testing
- Operation and Maintenance
- Frequently Asked Questions
- Conclusion
Introduction: Why Proper Installation of Heat Shrink Termination Determines Cable Life
Installationheat shrinkable end sleeveis not just a mechanical connection of conductors, but the creation of a complex dielectric system, the quality of which determines the uninterrupted power supply of the entire facility. In our practice, we have repeatedly encountered situations where expensive power cables failed after six months of operation solely due to errors in the installation of terminations. Statistics show that up to 70% of accidents in distribution networks with voltages up to 35 kV occur precisely at the points of connections and terminations, and not on extended sections of the line. This guide is based on the real-life experience of engineers who install thousands of pieces of equipment every year, and is designed to eliminate common mistakes that lead to insulation breakdown or overheating of contacts.
Heat-shrinkable materials have shape memory and are capable of creating a sealed, monolithic coating that protects the cable from moisture, chemical influences and mechanical damage. However, the shrinkage process itself requires strict adherence to temperature conditions and sequence of actions. Violation of technology even at one stage can lead to the formation of air inclusions (voids) inside the insulation, which, under the influence of high voltage, turn into sources of partial discharges. We'll walk you through every step of the process, from tool preparation to final electrical testing, so you can get the job done right the first time.
Preparatory stage: Tools, materials and safety requirements
The quality of the installation is established even before you touch the cable. An incorrectly selected tool or lack of necessary materials often leads to the fact that the installer begins to improvise using improvised means, which is strictly unacceptable when working with high-voltage equipment. Before starting work, make sure that you have a complete set of specialized tools. Unlike household tasks, here you cannot replace a gas burner with a construction hairdryer, and a knife for stripping insulation with an ordinary stationery knife.
For professional installation you will need:
- Gas burner with a narrow flame:A wide flame leads to uneven heating and charring of the material. The flame should be soft, yellow-blue, without soot.
- Stripping knife with adjustable cutting depth:It is critical not to damage the cable cores and semiconducting shield. The cutting depth should be adjusted so that the blade only removes the insulation without touching the metal.
- Files and abrasive belts:Necessary for removing burrs after cutting cores. Any irregularity on the surface of the conductor creates a concentration of the electric field.
- Lint-free wipes and special cleaner:Ordinary rags leave lint, which, under a layer of heat shrink, becomes a conductor of moisture and dirt. Use only alcohol-based cleaners recommended by the manufacturer.
- Protective gloves and glasses:Working with open flames and chemical cleaners requires compliance with safety precautions.
Pay special attention to the choice of the coupling itself. It must strictly correspond to the cross-section and type of cable (armored, shielded, with paper or cross-linked polyethylene insulation). Using a muff “one size too big” with the hope that it will shrink is a grave mistake. Heat-shrinkable materials have a shrinkage limit typically of 2:1 or 3:1, but the compressed wall thickness must provide the required dielectric strength. CompanyShijiazhuang Hist Electric Co.,Ltd, being one of the leading manufacturers of cable accessories, recommends that you always check the markings on the packaging with the cable datasheet. Their products, including terminations for voltages of 1 kV and above, are supplied with clear sizing instructions, eliminating confusion on site.
Check environmental conditions. Installation is prohibited during rain, snow or fog, unless a special protective awning or tent is used. Air humidity should not exceed 70%, and the ambient temperature should be above +5°C. If work is carried out outdoors in winter, the cable must be preheated in a warm room for at least 24 hours. A cold cable may crack when cutting, and condensation formed when it is brought into a warm room will lead to breakdown immediately after switching on voltage.
Step-by-step instructions for installing a heat-shrinkable end sleeve
The installation process can be divided into several critical steps. Omitting any of them or changing their sequence is unacceptable. Below is a detailed technology tested on thousands of objects.
- Preparing the cable end and removing the outer sheaths
The first step is to determine the required cable length according to the coupling manufacturer's instructions. Typically this length depends on the voltage class and the type of equipment to which the cable is connected. Make circular cuts into the outer insulation and armor, being careful not to damage the inner layers. When removing armor tape, use side cutters, avoiding sharp edges that could cut through the heat shrink later. After removing the armor, be sure to clean the surface from bitumen or adhesive residues with a solvent. At this stage, they often make the mistake of leaving sharp edges of the armor. In our practice, there was a case when the sharp edge of the armored wire cut through a heat-shrinkable tube after a month of operation, which led to moisture ingress and corrosion. Be sure to file the edges of the armor or use a special filling tape to level the profile.
- Installation of grounding and sealing of armor
To ensure safety and correct operation of the protective relays, it is necessary to reliably ground the cable armor. Use copper braided grounding tape, secured to the armor using spring clips or soldering (if the armor type allows). The mounting area must be thoroughly cleaned to a metallic shine. Apply a layer of sealing mastic or hot melt adhesive over the joint, and then shrink a short heat-shrinkable tube (cuff). Heating should be done evenly, starting from the middle of the cuff and moving towards the edges to squeeze out excess glue and ensure complete sealing. Lack of sealing at this stage is the most common reason for groundwater entering the cable when laid in the ground.
- Removing insulation and preparing cores
Carefully remove the main insulation from the cable cores to the length necessary for connection to the equipment contacts (usually this is the length of the ferrule sleeve plus 5-10 mm). Use a special knife, controlling the depth of the cut so as not to make cuts on the aluminum or copper conductors. Even a microscopic scratch reduces the cross-section of the conductor and creates an overheating point. After removing the insulation, clean the wires with abrasive sandpaper to a metallic shine, removing the oxide film. Immediately after stripping, apply a thin layer of quartz-vaseline grease (for aluminum) or leave clean (for tin-plated copper) to prevent re-oxidation until crimping.
- Installation of tips and crimping
Place the cable lugs onto the stripped wires. Make sure they match the core material (copper-copper, aluminium-aluminum or bimetallic). Perform crimping with a hydraulic press using dies of the correct size. The number of crimps and their location must comply with GOST or the recommendations of the tip manufacturer. Crimping should begin from the tip hole (contact side) to the cable core. After crimping, be sure to remove the burrs on the end of the tip with a file. The sharp edges on the tip create a high electric field intensity, which can cause corona and destruction of the coupling insulation. In the product lineShijiazhuang Hist Electric Co.,LtdIntroducing removable contact tips designed to minimize contact resistance and ease of installation in confined spaces.
- Installation of insulating gloves or tubes
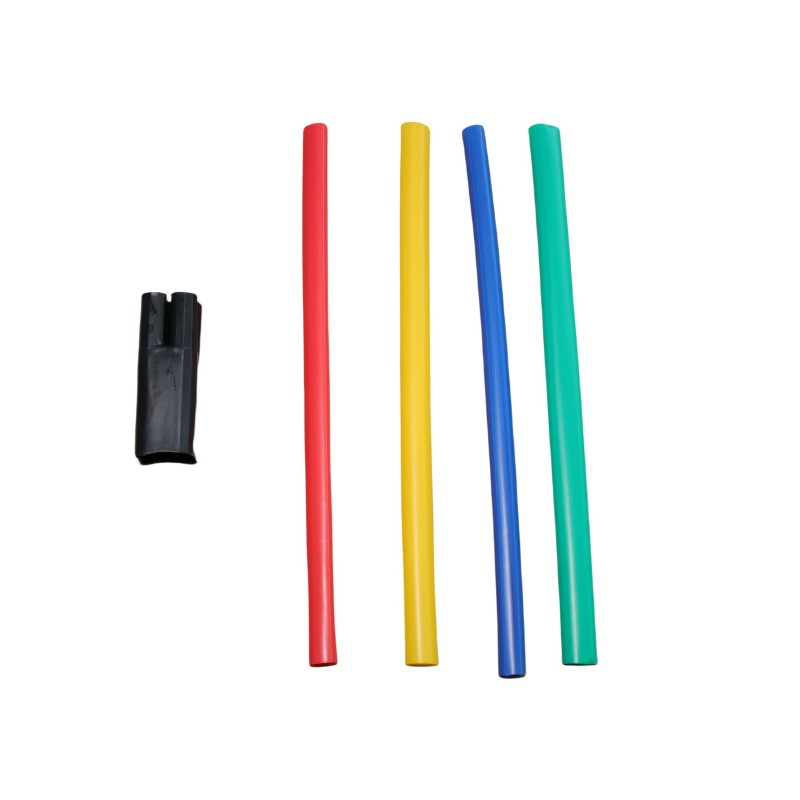
This is a key stage in the formation of basic insulation. Place a heat shrink glove (for multi-core cables) or individual tubes on each core. If a glove is used, begin shrinking at the base (root) where the glove fits over the overall cable sheath. Heat the material in a circle, slowly moving towards the fingers of the glove. The movement of the flame must be constant; do not linger in one place for a long time so as not to overheat the material. Excess hot melt adhesive should protrude from the edges of the glove, indicating complete shrinkage and sealing. Pay special attention to the interfacial space (“horns” of the glove). There should be no voids or folds left. Air bubbles at this location are dielectrics with low breakdown capacity and quickly lead to an interphase short circuit.
- Installation of stress control (for cables above 1 kV)
For medium voltage cables (6-35 kV), it is critical that the electrical field controls are installed correctly. A special stress tube is installed or stress tape is applied to the place where the semiconducting screen is cut. This element smoothes out the concentration of the electric field at the edge of the screen, preventing partial discharges. The tube must extend onto the semiconducting screen by at least 20 mm and onto the main insulation to the length specified in the instructions. Violation of this requirement - installing the tube with an offset - makes the entire protection system useless. Warm up carefully, avoiding local overheating, which could damage the sensitive stress control layer.
- Final insulation and anti-tracking protection
The final step is to install external conduits or skirts, which provide weatherproofing and increase the surface creepage path. For outdoor installation, couplings with a ribbed surface (skirts) are used to prevent the formation of a continuous film of water during rain. Shrink from the bottom up, expelling the air. Make sure all layers fit snugly together. Pay attention to the phase marks (yellow, green, red) only after complete shrinkage, so as not to damage them with the tool during operation. The final visual inspection should confirm the absence of burns, blisters and unheated areas.
Typical installation errors and methods for preventing them
Even experienced installers can make mistakes, especially when working in difficult weather conditions or when in a hurry. Failure analysis shows that most problems are not associated with defects in the material itself, but with technology violations.
Mistake #1: Overheating the material.Many people try to speed up the process by using high-powered burners and keeping the flame too close to the surface. This leads to thermal degradation of the polymer: it becomes brittle, loses elasticity and can crack at the slightest vibration of the cable. The correct sign of shrinkage is the adhesive protruding around the edges and a smooth, shiny surface without discoloration. If the material turns black or becomes blistered, it is damaged and requires replacement.
Mistake #2: Poor surface preparation.Remaining moisture, dust or grease stains under the heat shrink layer create channels for the development of breakdown. Cleaning must be performed immediately before installing the element. Do not touch the cleaned surface with your hands. In our practice, there was a case of failure of a transformer substation three months after launch. Investigation revealed that the installer wiped the insulation with a mitt soaked in industrial oil instead of using an alcohol cleaner. The oil reduced the surface resistance, which led to a sliding discharge.
Mistake #3: Incorrect direction of shrinkage.Heat-shrinkable products should always be shrinked from a fixed point to the free end in order to expel air and excess glue out. If you start shrinking from the middle or from the free end, air pockets will form inside that cannot be removed. These voids become sites for partial discharges, which gradually destroy the insulation from the inside.
Mistake #4: Ignoring bend radii.After installation, the coupling has a certain rigidity. Sharp bends in the cable immediately after exiting the coupling can lead to material peeling or cracks. Observe the minimum permissible bending radius specified in the cable data sheet. To secure the cable position, use supporting structures to remove mechanical stress from the termination site.
Quality control and acceptance testing
Completion of installation does not mean the end of the work. Before applying voltage, it is necessary to carry out a set of checks to confirm the quality of the work performed. Ignoring this stage is tantamount to launching the equipment “blindly”.
Visual inspection is the first and mandatory step. Check the integrity of the coating, the absence of burns, cracks and blisters. Make sure the phasing (color marking) is done correctly. Check for escaping glue along all edges of the shrink elements - this is the main indicator of tightness.
Electrical tests are carried out in accordance with the standards of PUE and PTEEP. The main types of tests for terminations include:
- Insulation resistance measurement:This is done with a megohmmeter at a voltage of 2500 V. The values must comply with the standards for this voltage class (usually at least 10 MOhm per 1 kV, but specific numbers depend on the cable length and temperature).
- High rectified voltage test:For cables up to 35 kV, a direct current test is carried out. Voltage is supplied in steps, and each step is maintained for a certain time. The absence of breakdown and stability of the leakage current indicate the quality of the insulation.
- Contact resistance measurement:The resistance of the cable-to-lug transition should not exceed the resistance of a whole core of the same length by more than 20%. High resistance will lead to overheating and burnout of the contact under load.
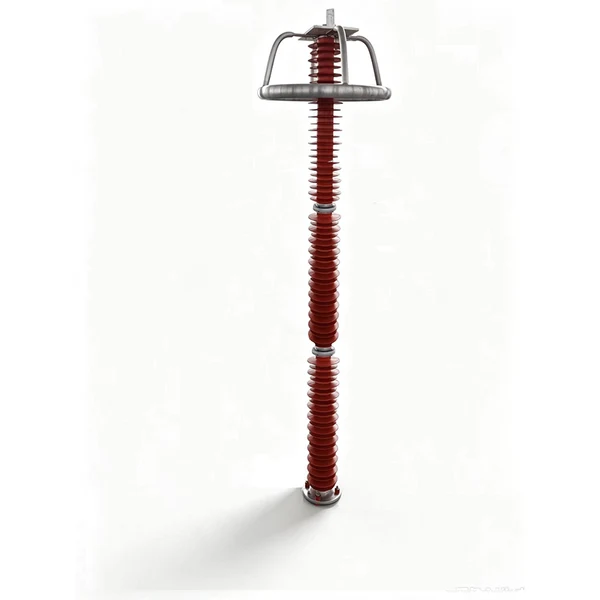
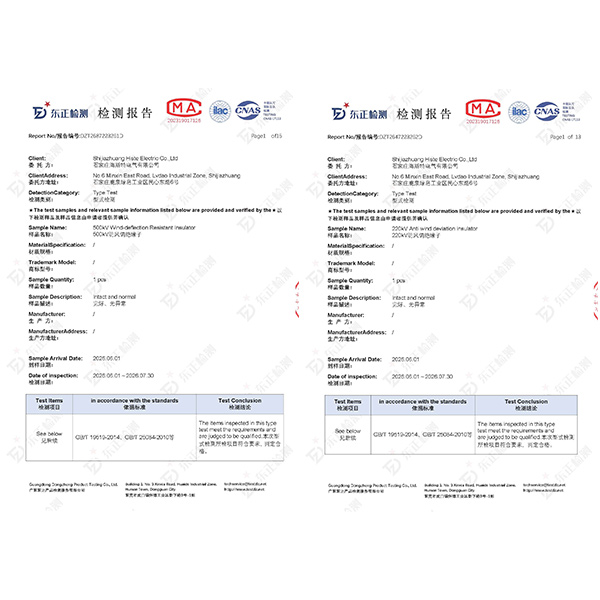
CompanyShijiazhuang Hist Electric Co.,Ltdis equipped with one of the largest electrical laboratories in Northern China, capable of performing a full cycle of testing the electrical characteristics of products in the range of up to 1000 kV. This approach to quality control in production allows us to guarantee that each unit of product, be it a 10 kV lightning rod or an end coupling, meets the declared characteristics even before shipment to the customer. However, even the highest quality product requires proper installation and final inspection on site. Laboratory tests at the plant do not replace acceptance tests of the installed line.
The results of all measurements must be recorded in the protocol. Only with a positive test report is it allowed to switch on the equipment to operating voltage. If deviations are identified, it is necessary to localize the defective area and redo the installation. Attempts to “burn through” a defect with increased voltage are unacceptable, as this only aggravates the damage to the insulation.
Operation and Maintenance
The service life of a properly installed heat-shrinkable sleeve is comparable to the service life of the cable itself and can reach 30 years or more. However, this is only possible with regular maintenance. During operation, materials are exposed to ultraviolet radiation, temperature changes, vibrations and chemical reagents.
It is recommended to conduct scheduled inspections at least once a year, and extraordinary ones after emergency shutdowns or natural disasters. When inspecting, pay attention to:
- Surface condition: the appearance of cracks, chalky deposits (a sign of aging of the polymer) or traces of overlap (black tracks).
- Tightness of the ends: are there any traces of oil leakage (for oil-filled cables) or moisture.
- Contact heating: Use a thermal imager to check the temperature of the contact connections under load. The temperature difference between the contact and the cable core should not exceed 10-15°C.
If minor mechanical damage (scratches, cuts) is detected, they can be repaired using repair tapes or pads compatible with the coupling material. Deep damage or traces of electrical breakdown require complete replacement of the end seal. Don't try to cover up serious defects with tape or paint - this will create a false sense of security and lead to an accident at the most inopportune moment.
ProductsShijiazhuang Hist Electric Co.,Ltdпроектируется с учетом требований эксплуатации в сложных климатических и технических условиях, в том числе при повышенных механических нагрузках и переменных температурных режимах. Использование силиконовой резины и современных полимеров обеспечивает высокую стойкость к ультрафиолету и озону, что особенно актуально для открытых распределительных устройств (ОРУ) в жарком климате или регионах с высокой солнечной активностью. Тем не менее, человеческий фактор при монтаже остается самым слабым звеном, поэтому соблюдение описанной выше технологии является залогом долговечности.
Frequently Asked Questions
Можно ли использовать строительный фен вместо газовой горелки?
Нет, использование строительного фена категорически не рекомендуется для монтажа высоковольтных термоусаживаемых муфт. Температура воздуха из фена недостаточно высока для быстрого и равномерного прогрева толстостенных трубок, особенно в холодную погоду. Это приводит к тому, что внешний слой материала усаживается, а внутренний остается холодным, создавая напряжения и пустоты. Кроме того, поток воздуха может занести пыль и влагу под усаживаемый материал. Газовая горелка обеспечивает необходимый тепловой поток для активации клеевого слоя и правильной усадки.
Что делать, если термоусадка треснула во время монтажа?
Если трещина появилась в процессе усадки, данный элемент считается бракованным и подлежит немедленной замене. Попытки заклеить трещину или насадить сверху еще один слой трубки не восстановят диэлектрическую прочность и герметичность. Трещина чаще всего возникает из-за перегрева (пересушивания) материала или наличия острых кромок на кабеле, которые не были зашлифованы. Необходимо аккуратно срезать поврежденный участок, устранить причину (зачистить кромку) и установить новый элемент из ремкомплекта.
Как хранить термоусаживаемые муфты до монтажа?
Хранить изделия следует в оригинальной упаковке в сухом, проветриваемом помещении при температуре от -20°C до +40°C. Недопустимо хранение под прямыми солнечными лучами или вблизи источников тепла, так как ультрафиолет и высокая температура могут инициировать преждевременную усадку или деградацию материала. Срок годности обычно составляет 5-10 лет при соблюдении условий хранения, но перед монтажом просроченных изделий рекомендуется проверить их эластичность и состояние клеевого слоя.
В чем разница между муфтами для внутренней и наружной установки?
Основное отличие заключается в конструкции внешней поверхности и материале. Муфты для наружной установки имеют ребристую поверхность (юбочки), которые увеличивают путь утечки тока по поверхности во время дождя или тумана, предотвращая перекрытие. Они также изготавливаются из материалов, устойчивых к ультрафиолетовому излучению и атмосферным воздействиям. Муфты для внутренней установки имеют гладкую поверхность, так как в помещении нет воздействия осадков и УФ-лучей, и использование юбочек там избыточно. Установка внутренней муфты на улице приведет к быстрому старению и пробою, а наружной в помещении — к накоплению пыли в ребрах и снижению изоляционных свойств.
Conclusion
Installationheat shrinkable end sleeveсвоими руками возможен и экономически целесообразен, но только при условии строгого следования технологии и использования качественного инструмента. Каждый этап — от зачистки брони до финального прогрева — влияет на надежность всей энергосистемы. Экономия времени или пренебрежение правилами безопасности на этапе установки неизбежно ведет к многократно большим затратам на ремонт и простои в будущем. Помните, что электроэнергия не прощает ошибок.
Выбирая комплектующие, отдавайте предпочтение проверенным производителям с собственной лабораторной базой и опытом работы на международном рынке. Продукция, прошедшая жесткий контроль качества, такая как решения отShijiazhuang Hist Electric Co.,Ltd, дает уверенность в том, что материал поведет себя предсказуемо при усадке и прослужит десятилетия. Инженерная компетенция, подтвержденная патентами и испытаниями до 1000 кВ, является гарантом того, что вы используете технологию, а не просто “пластик”.
Если у вас возникли вопросы по подбору типоразмеров муфт для специфических условий эксплуатации или требуется консультация по монтажу сложных узлов, не рискуйте безопасностью объекта. Обратитесь за технической поддержкой к специалистам, которые готовы сопровождать ваш проект от расчета до ввода в эксплуатацию.
Подробнее о кабельной арматуре и аксессуарах для высоковольтных сетей